Skip to content

Category: DIY/Making

Posts about the Maker movement and/or my attempts to delve into it.

Poetic Tech at the Decatur Book Festival: The “Bloop-Bleep” Stage

On Sunday, August 31, 2014, I did a presentation on the intersection of technology and poetry at art|DBF, an art-oriented segment of the Decatur Book Festival. The presentation was the culmination of several months of coding to develop a system that allowed a poet and an audience to create an interactive soundscape.


Why did I do this?

Most people, when they think of poetry, they think of it as this fundamentally human, often life-affirming human activity.

Most people, when they think of technology, think of it as this inhumane, if not inhuman, often soul-crushing process.

This is a false dichotomy, of course. Poetry and technology are both artifacts of what humans do. They are both profoundly human acts.

From the campfire to the cathedral, from the crystal AM radio to the liquid crystal display, our technology has affected what form poetry takes, who creates it, who listens to it, where it is experienced, and how it is distributed.

My intent was to build a demonstration of one possible way to enhance the the experience of poetry for both poet and audience.


How did it work?

I built a web based audio application that controlled sounds with smartphones.

The phones accessed a web server running on my laptop. The pages for the audience could read through the poems being performed and manipulate sounds using one of three instruments.
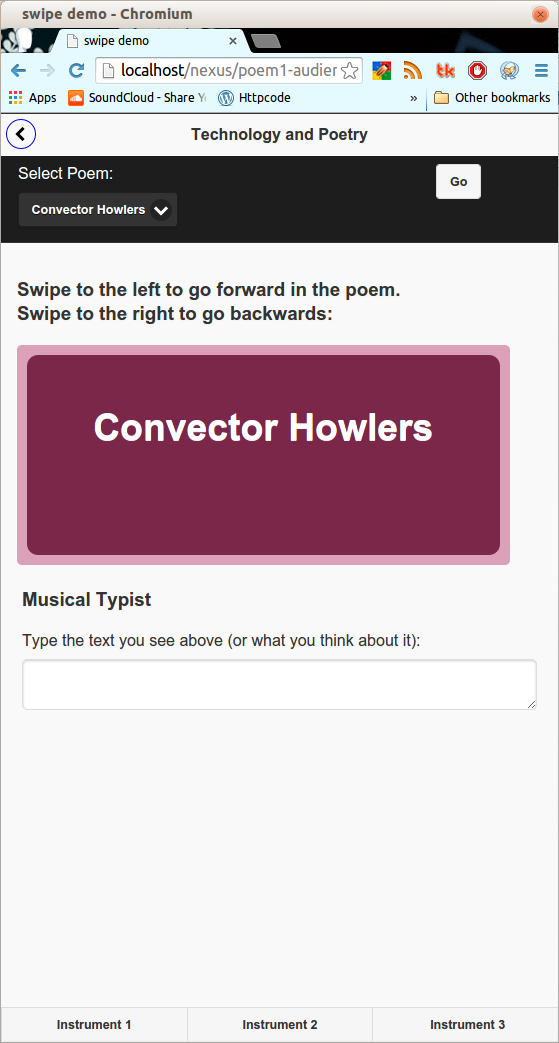
Audience UI

The audience accesses a website via smartphone. The site offers a view of the current poem, a dropdown selection of poems, and links to one of three musical interfaces, the first of which displays by default.

The three interfaces do the following things:

  • Instrument 1: create a rain stick-like sound with different effects based moving a point within an small window;
    swipe demo - Chromium_465
  • Instrument 2: a set of four percussion pads;
    swipe demo - Chromium_466
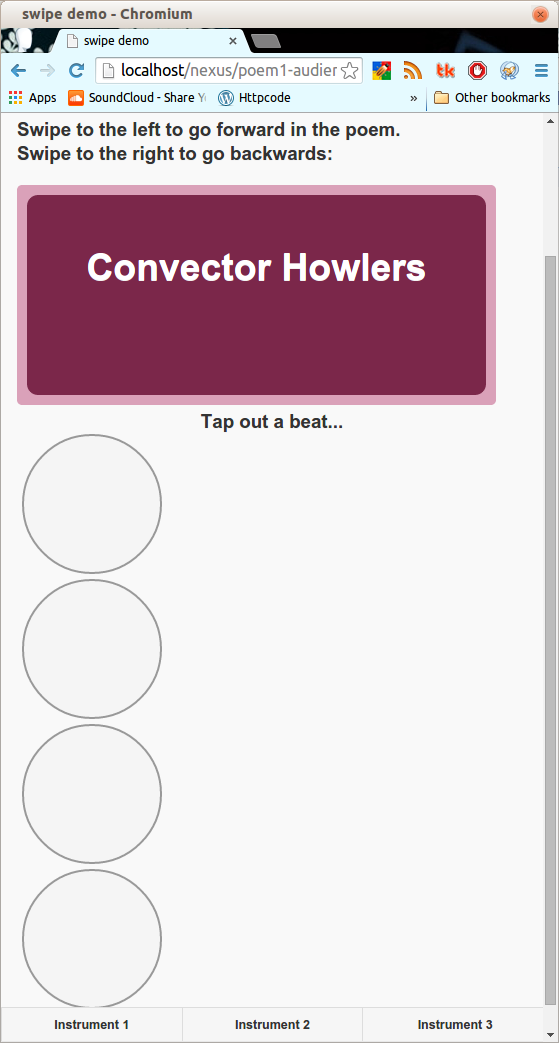
  • Instrument 3: a text area that creates sounds for each word typed.
    swipe demo - Chromium_467

Poet UI

The interface for the poet has six options – unfortunately only four worked at the time of performance, and only three worked without issues.

  • Effect 1: pitch follower creating audio effect a fifth higher than detected frequency
  • Effect 2: pitch follower creating audio effect a seventh higher than detected frequency
  • Effect 3: Multicomb filter
  • Effect 4: Spectacle filter
  • Effect 5: Hypnodrone – drone effect kicked off by detected amplitude
  • Effect 6: Stutter – warbling bass line using sine oscillator. Originally intended to create a glitch effect.

Poet UI - Chromium_468


The speaker had a separate interface for adding vocal effects and a background beat.

The web pages sent messages to a set of ChucK scripts running on my laptop. The scripts generated the sounds and altered the vocals as well as recorded the presentation.


How did it go?

The presentation itself was well-received. It was in the tent for Eyedrum, an Atlanta-based, non-profit organization developing contemporary art, music and new media in its gallery space.

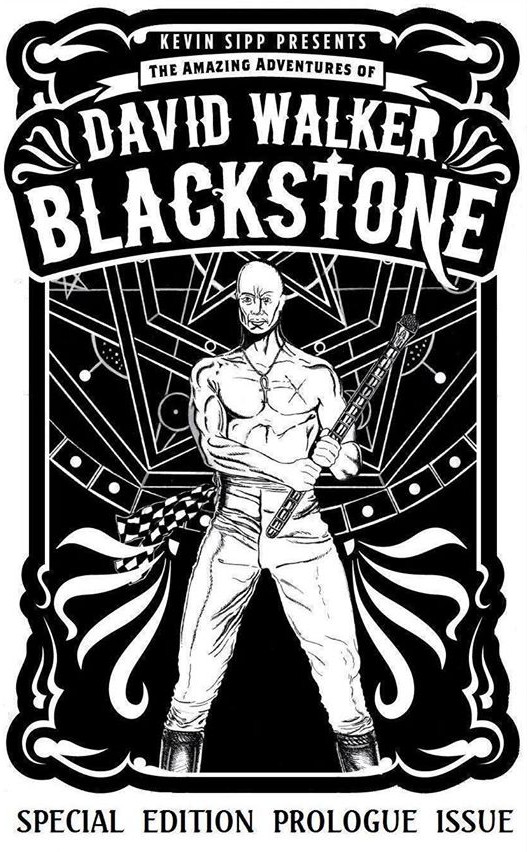
I did my presentation outside with a set of powered PC speakers attached to the laptop. Later, I borrowed a PA and mixer from my friend and fellow poet Kevin Sipp. By the way, check out his debut graphic novel, The Amazing Adventures of David Walker Blackstone:


1655583_269790189852487_1506966739_o

The laptop was attached to a wireless router that passersby could use to connect to the website. Everyone was able to connect and interact with the site. There were some glitches – which I’ll talk about later – but for the most part, people seemed intrigued by the possible uses of mobile and web technology for poetic performances.

A couple of components either did not perform as expected or did not work at all. Of the audience-specific pages, Instrument 3 did not play or was at too low a volume to be heard over the ambient sounds of the festival. There were also some issues with switching between poems.

The poet-specific pages had issues with two of the six effects: “Multicomb” and “Spectacle”. The multicomb filter had a problem with feedback and was too loud. The spectacle effect didn’t work at all. In addition, the audio started suffering from latency issues. The recording of the first twenty minutes of the presentation started suffering from unintended glitching and was pretty much ruined. The recording of the last fifteen minutes was a little better (I stopped the recording to switch to Kevin’s PA setup), but suffered from the same issue not long into the presentation.


Conclusion

Overall, I think the presentation was well-received, and people were intrigued by what they heard. The issues with the setup became clear when I reviewed the recordings. There’s definitely room for improvement, and I will definitely build upon this design for future performances.

So good, bad, or ugly, I’m posting both recordings (Part 1 and Part 2) and the code for all to see.

Despite the issues, I consider the project a success. This is a prototype, so I expected some problems. Luckily, none of the problems were catastrophic. There were lots of bloops and bleeps, but nothing went “boom”. It would only have been a failure if I had learned nothing from the experience.

Until next time, check out the code, play with, let me know if you use it or modify it.


Comments closed

Enhancing Poetry With Pitch-Following Effects And Sounds, Part 2: Interesting Mistakes

I’ve put together a proof of concept for enhancing poetry with ChucK scripts, however, I soon realized that I wasn’t actually doing pitch-following. Instead, the code I put together was something called an “envelope follower”. I’ve uploaded the code to GitHub in case anyone wants to play around with it (you’ll need ChucK and the Audicle or miniAudicle IDE).

My physics is really rusty, so the best way I can explain it is that instead of checking the pitch of the voice to determine whether to kick off an effect, the script checks the *power* of the voice. I interpret this as more of a measurement of inflection or stress.

Not exactly what I’d planned, but it’s in the right direction.

This first draft of the script taught me a few things about how to build ChucK scripts that would respond to vocal input. For starters, I now have a new dimension to the vocals that I can use to kick off effects. Currently the threshold used to determine when the effects start has to be manually adjusted, but that could be dynamically changed through some other criteria like external data feeds or input by other people.

I also found that I needed to have a means to stop as well as start effects. When I first put the code together without having a means to stop an effect, the result got noisier and louder until I manually stopped the program.

I also wanted to vary the duration of the effects, so I did the following: (1) I included a global class for setting tempo and note durations; then (2) I added an array of time durations and looped through them each time an effect got kicked off.

Most of the resulting code is cobbled together from existing code examples found on the internet. My coding philosophy for the most part is based on what I call “the thieving magpie”: find components that do what I want (or close to it), slap them together, then modify as needed until I get the desired result.

The poem I used for the demo is “The Seekim”, by Sidney H. Sime. It comes from the book “Bogey Beasts”, which is out-of-print and hard-to-find. Each poem was written and illustrated by Sime; each poem also had a musical score written by Joseph Holbrooke. I’ve never heard the music performed, but the book fascinated me. I’m still kicking myself for having sold it at a used book store almost twenty years ago.

[soundcloud url=”https://api.soundcloud.com/tracks/157563219″ params=”auto_play=false&hide_related=false&show_comments=true&show_user=true&show_reposts=false&visual=true” width=”100%” height=”450″ iframe=”true” /]

So even though I didn’t exactly know what I was coding, I got some results I liked, and learned enough to start thinking about next steps.

Leave a Comment

A Shared Instrument Using Game Controllers and a Laptop

On April 20, 2014, I held my first public performance using an instrument I built and programmed.

It was a gamepad-controlled musical instrument, combining off-the-shelf hardware and open source software.

The performance was held for Sunday Assembly Atlanta (SAA), a secular organization whose motto is: Live Better, Help Often, Wonder More.

(For the folks at SAA – I apologize for taking so long to write this, but here it is – along with the source code on GitHub – for any geeks in the crowd who want to play with it themselves.)

After finishing a critical phase of a work-related project, I now have time to write an overview of what I did, why I did it, how it turned out, and what I learned.

Why do this?

I started thinking about this project after attending the first two meetings of Sunday Assembly Atlanta. There were several parts of the meeting where we did karaoke, and I was wondering whether there was another form of musical interaction – perhaps even unique to the organization – that we could do as a body.  That got me thinking about new ways of looking at how music could be made and how it could be experienced.

Thus began this experiment in collaborative music.

What did I build?

Over the course of a few months I built a “shared” instrument that used wireless PlayStation3 controllers to build loops of  user-selected samples.  The audience would pass around the controllers to add and remove samples from musical tracks that had predefined beats and time signatures. The patterns they created would be be projected on a screen as a sequencer-like display.

[youtube=http://www.youtube.com/watch?v=el22V6u63Uw]


Why did I build it this way?

I know a lot of different programming languages, but really didn’t have a good idea of how to create sounds (much less music) starting from raw code. I needed to use something that met the following criteria:

  1. Didn’t take too long to learn
    I wanted to start and finish within a reasonable period of time;
  2. Cheap/free to learn
    I’m thankful that in this day and age, you can learn pretty much any programming language for free (More on this later).
  3. Had a community of users who could offer suggestions and sample code
    No one wants to reinvent the wheel if they don’t have to;

I narrowed it down to two languages: ChucK and Processing.  I had recently learned ChucK through an instructor-led Coursera class. Once done, I found the language easy enough to use to do the types of projects I’m thinking about.

Processing I learned almost at the last minute because it had a framework for receiving Open Sound Control (OSC) signals. The language wasn’t that hard to grasp since I’d used something like in when I was playing with Arduino micro-controllers.

So…how does it work?

I used five PS3 DualShock Sixaxis controllers as the physical part of the instrument. I chose these controllers because (1) my son had one that I could experiment with;  and (2) other than a Bluetooth adapter and USB cable, they don’t require any additional hardware to connect to the computer.

The sound generators are a collection of scripts written in ChucK. Some scripts assign a collection of samples to each gamepad that’s linked to the computer. Other scripts define a common time signature and set of note lengths.

Again, the Processing sketch handles the visual display.

Each game pad controls a track. A track has collection of samples and a time signature assigned to it.

Once the sound generators start, they listen for the four buttons on the right side of the pad being pressed. Pressing those buttons assigns a sample to a beat that gets played during the next loop.

Code summary

Here’s the high-level summary of what each of the scripts in the instrument does.

initialize.ck

  • calls the global classes

score.ck

  • creates the tracks
  • assighs sample groups to each track
  • sets the asderss and port number the tracks send OSC signals on

BPM.ck

  • global time signature
  • sets beats per minute (that is, the tempo of the piece)
  • sets durations for quarter, eighth, 16th, and 32nd notes

SoundChain.ck

  • master volume

BaseTrack.ck

  • Defines the properties and methods that all track types have in common .

Track.ck

  • A type of BaseTrack
  • Adds more properties and methods specific to what I want this instrument to do.

AutoTrack.ck

  • Another type of BaseTrack – not implemented.
  • It was meant to take information about what was played so far and use some rules to automatically generate sounds or kick off samples.

joystick_test.ck

  • Joystick testing code borrowed from one of the examples on the ChucK site

rec-audio-stereo.ck

  • Records audio from the tracks

TrackSequence.pde

  • Processing sketch file for the instrument’s visual display.
  • Listens for signals from the tracks and displays them as a sequencer-like display


How do you hook up the game controllers?

I’m running an Ubuntu Linux system, so my process for getting the PS3 controllers hooked up via Bluetooth will differ from other systems. Once you’ve got one set up, hooking up others easy – it’s the same process.

I hooked up five controllers for the Sunday Assembly event, and from what I’ve read in various places, you can hook up as many as seven. I didn’t have time (or money) to buy a bunch of PS3 controllers, so I asked for folks to let me borrow any they could spare.

One thing to be aware of is that if you leave the controllers idle for too long, the Bluetooth connection drops – so keep an eye on their usage.


How did it go?

Despite a slight hiccup – and what public demo doesn’t have one? – we got the setup working so that people could play with it after the meeting. People seemed to find it interesting, and I got a lot of questions about how I built it. I also got suggestions from the audience and from people outside of Sunday Assembly for new rules, new samples/instruments, and new interfaces.

Here’s the raw audio (converted to MP3 format):

[soundcloud url=”https://api.soundcloud.com/tracks/150582520″ params=”color=00cc11&auto_play=false&hide_related=false&show_artwork=true” width=”100%” height=”166″ iframe=”true” /]

It’s a long file – I kept it running while people were eating brunch after the meeting.

I really appreciate all the feedback I’ve gotten – it will definitely influence not only the next iteration of this project, but future projects as well.

Lessons learned

  • When proposing a project that you’ve never done before, either keep your mouth shut until you have a proof-of-concept already done, or give yourself a *lot* of time to develop and test the project. Given what I do for a living, I should’ve known better, but I let the “holy crap, this is so cool!” aspect of it cloud my judgement of the level of effort involved.
  • Nothing is more motivating  than making an announcement in front of people, and then striving to meet their expectations.
  • To make this work better in the future, I need to use a more ubiquitous device to act as a user interface. The most obvious would be smartphones, and I’m looking into how I could incorporate smartphones into future shared instruments.

Update: Source Code Is Available

I’ve uploaded the source code to GitHub for those who want to play with the code.

Have fun with it, and let me know if you get anything useful out of it.

Leave a Comment